
DIY Upcycled Makeup Storage
[afflink]
If you’ve seen my instagram any time in the past couple months then you already know I’m going full steam ahead with my home office decor. I’ve spent the last two years slowly collecting furniture I love, and it’s sooooo close to being complete.
That is not what this post is about.
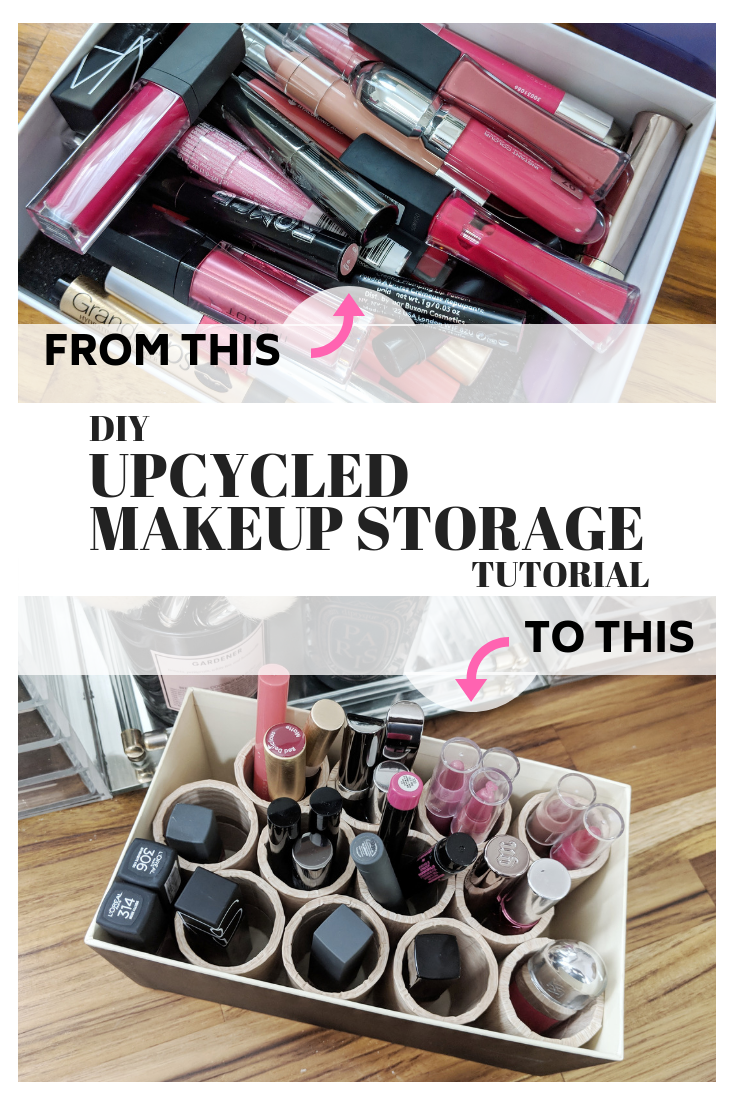
As part of the process, I’ve also been revamping my makeup storage. At our old house I tried the whole white IKEA desk & all acrylic storage thing, but eventually decided it’s not really my aesthetic. I’ve been cycling through other ideas for keeping myself organized, but I had one rule: no new plastic.
I read a few zero-plastic bloggers, and as much as I admire them, I doubt I’ll ever be on their level. Partly because most make comes in plastic packaging. What I can do is try to avoid bringing even more plastic into the house. To that end, I’ve been looking for acrylic storage alternatives, especially anything that can be upcycled or reused. The first project to come out of that is my new lipstick organizer. I asked on IG if I should do a tutorial on it, and since the answer was yes, well – here it is. And it’s crazy easy.
Supplies
You’ll need a few things, most of which you can find around the house.
- A box of some sort
- Cardboard tube(s) with 1.5-3 inch internal diameter
- Contact paper (or regular paper & adhesive)
- A saw or knife capable of cutting the cardboard tube
- Scissors
- Hot glue/other adhesive (optional)
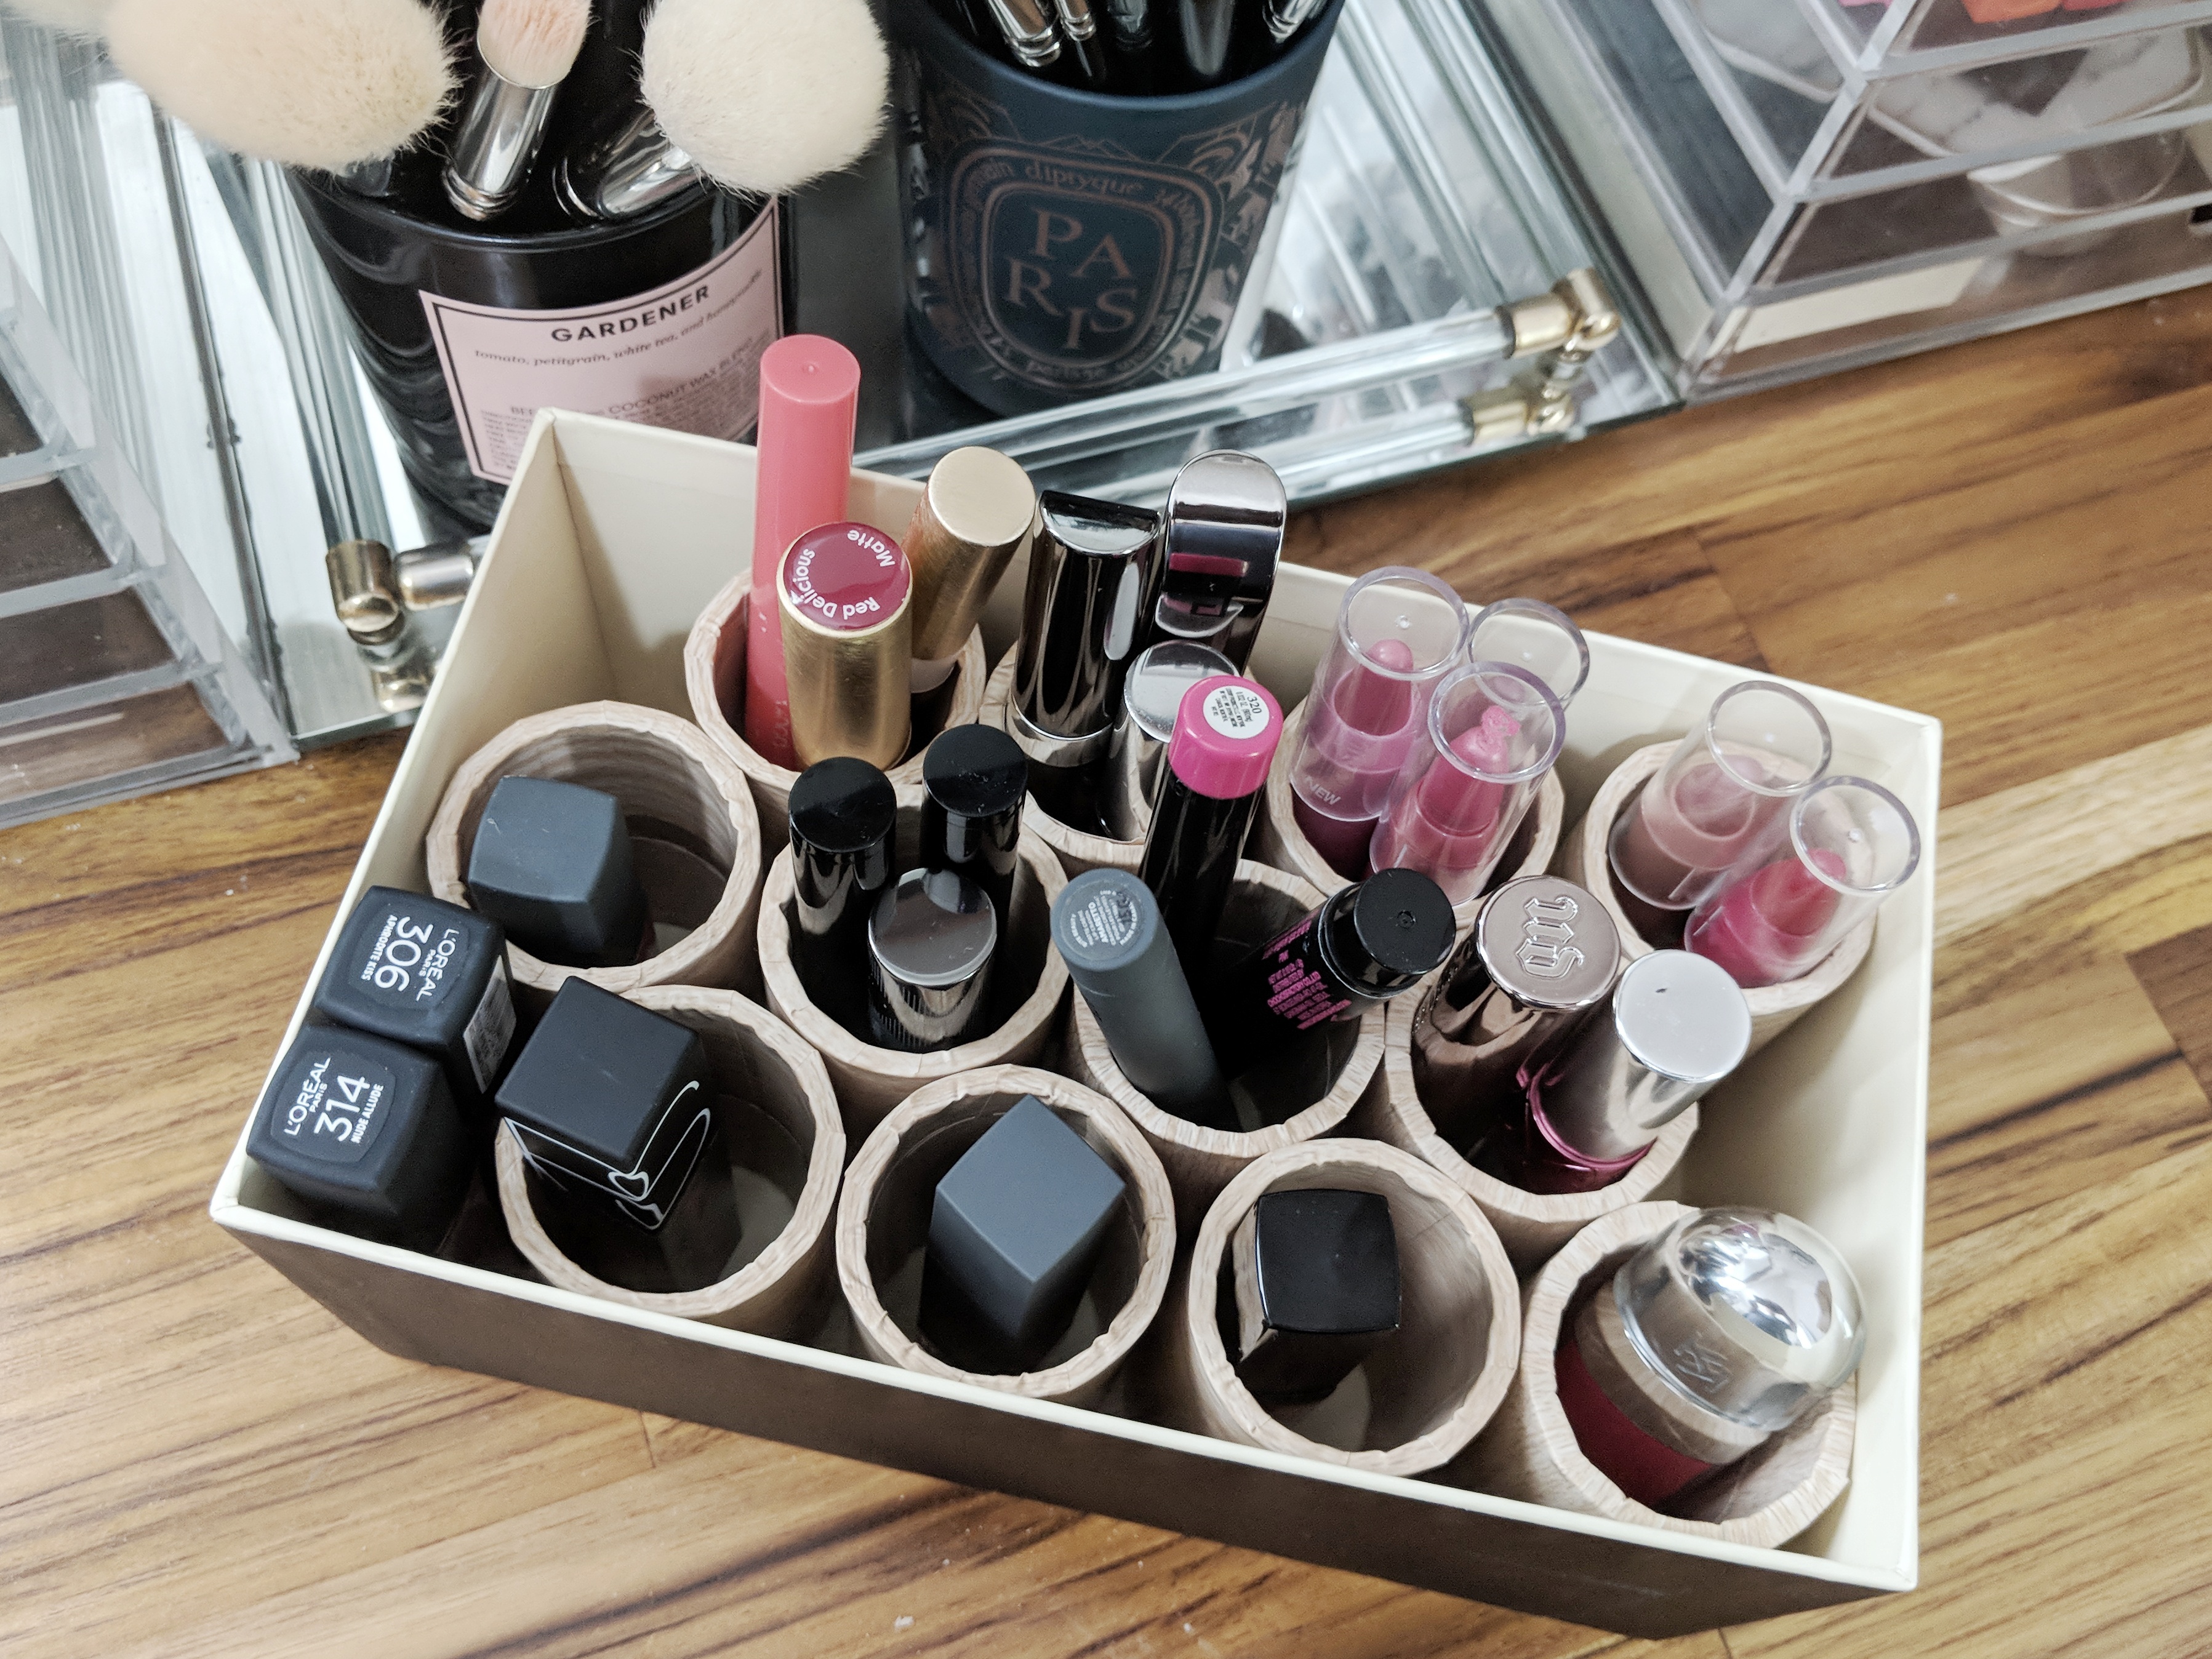
For this project I used one of the medium Jo Malone gift boxes – it’s the size their body products come in, and maybe the 3.4oz colognes also. Not only is it pretty, but it’s got fairly deep and will fit inside the deeper drawers in the IKEA Alex units. Obviously you can use whatever box you want – you’ll probably need to experiment with different sizes depending on the diameter of your cardboard tubes.
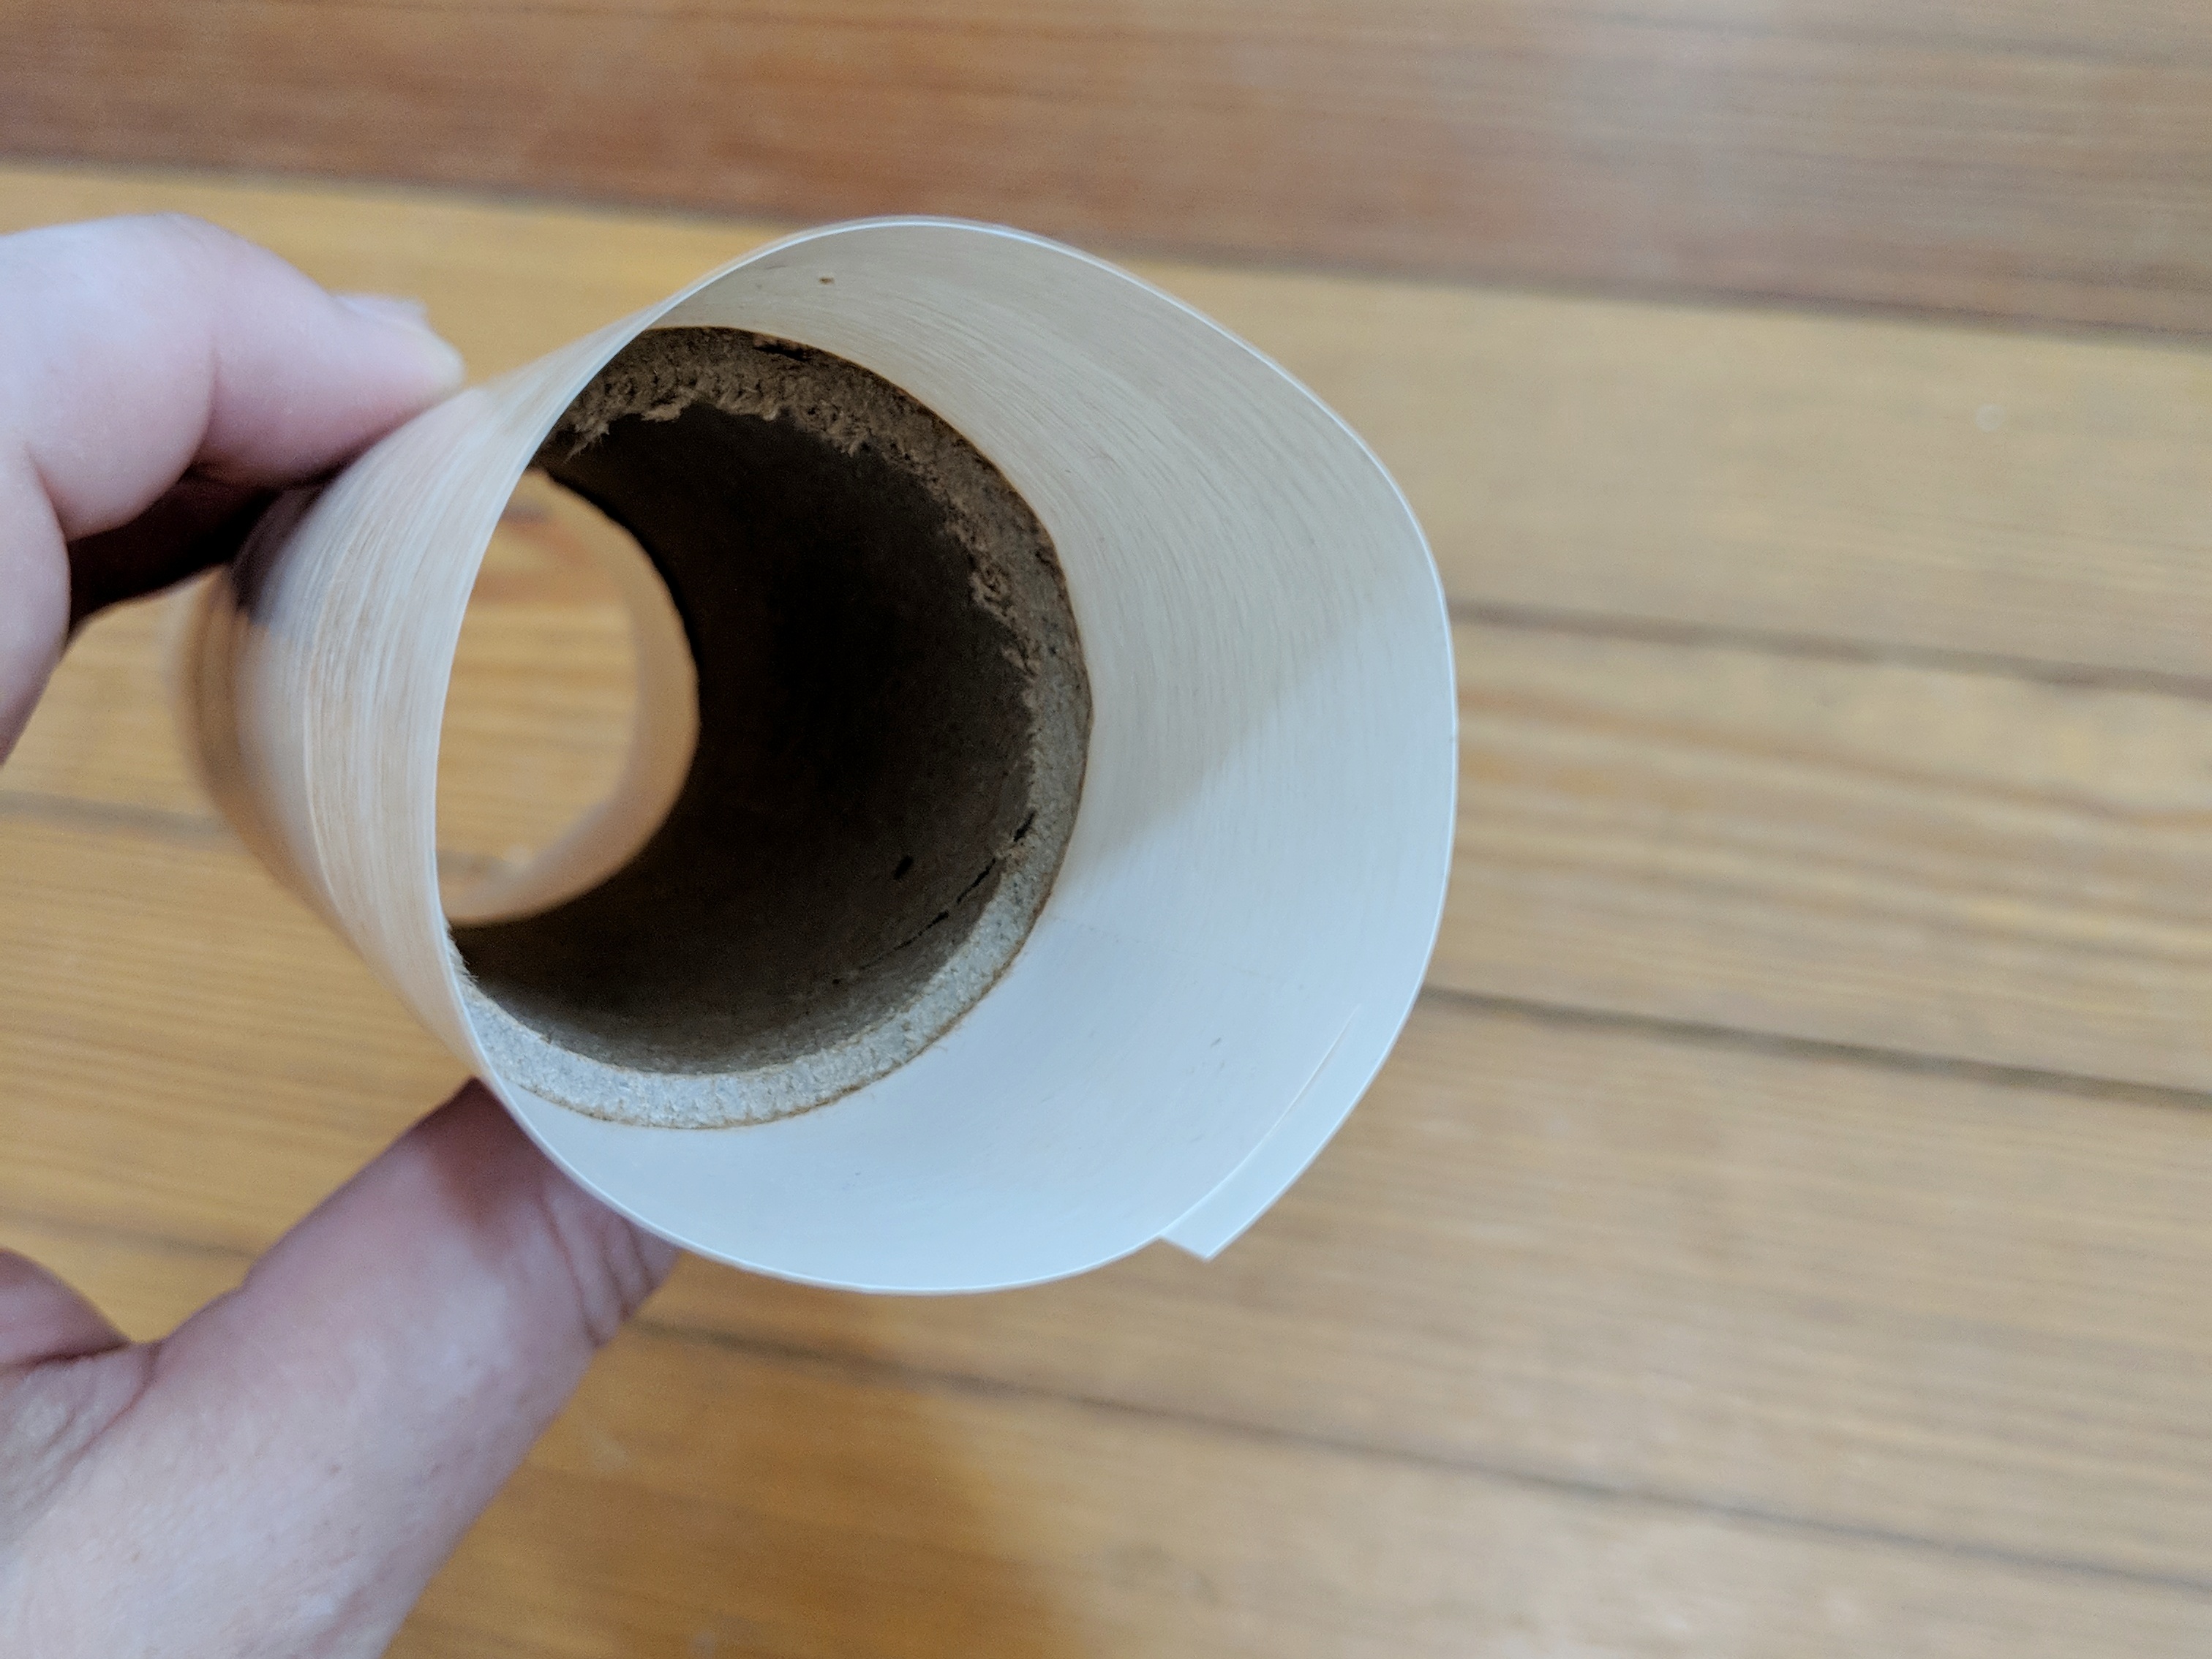
The cardboard tubes I used were from rolls of plastic sheeting at work – I snatched them up before they could make it to the recycling bin. I originally tried using toilet paper/paper towel rolls, but they were a little too flimsy. If you don’t have a ready source of heavy cardboard tubes, you could probably ask at any business that uses pallet wrap, weed barrier… you get the picture. Mailing tubes would probably work too.
Step 1: Prep Your Tubes
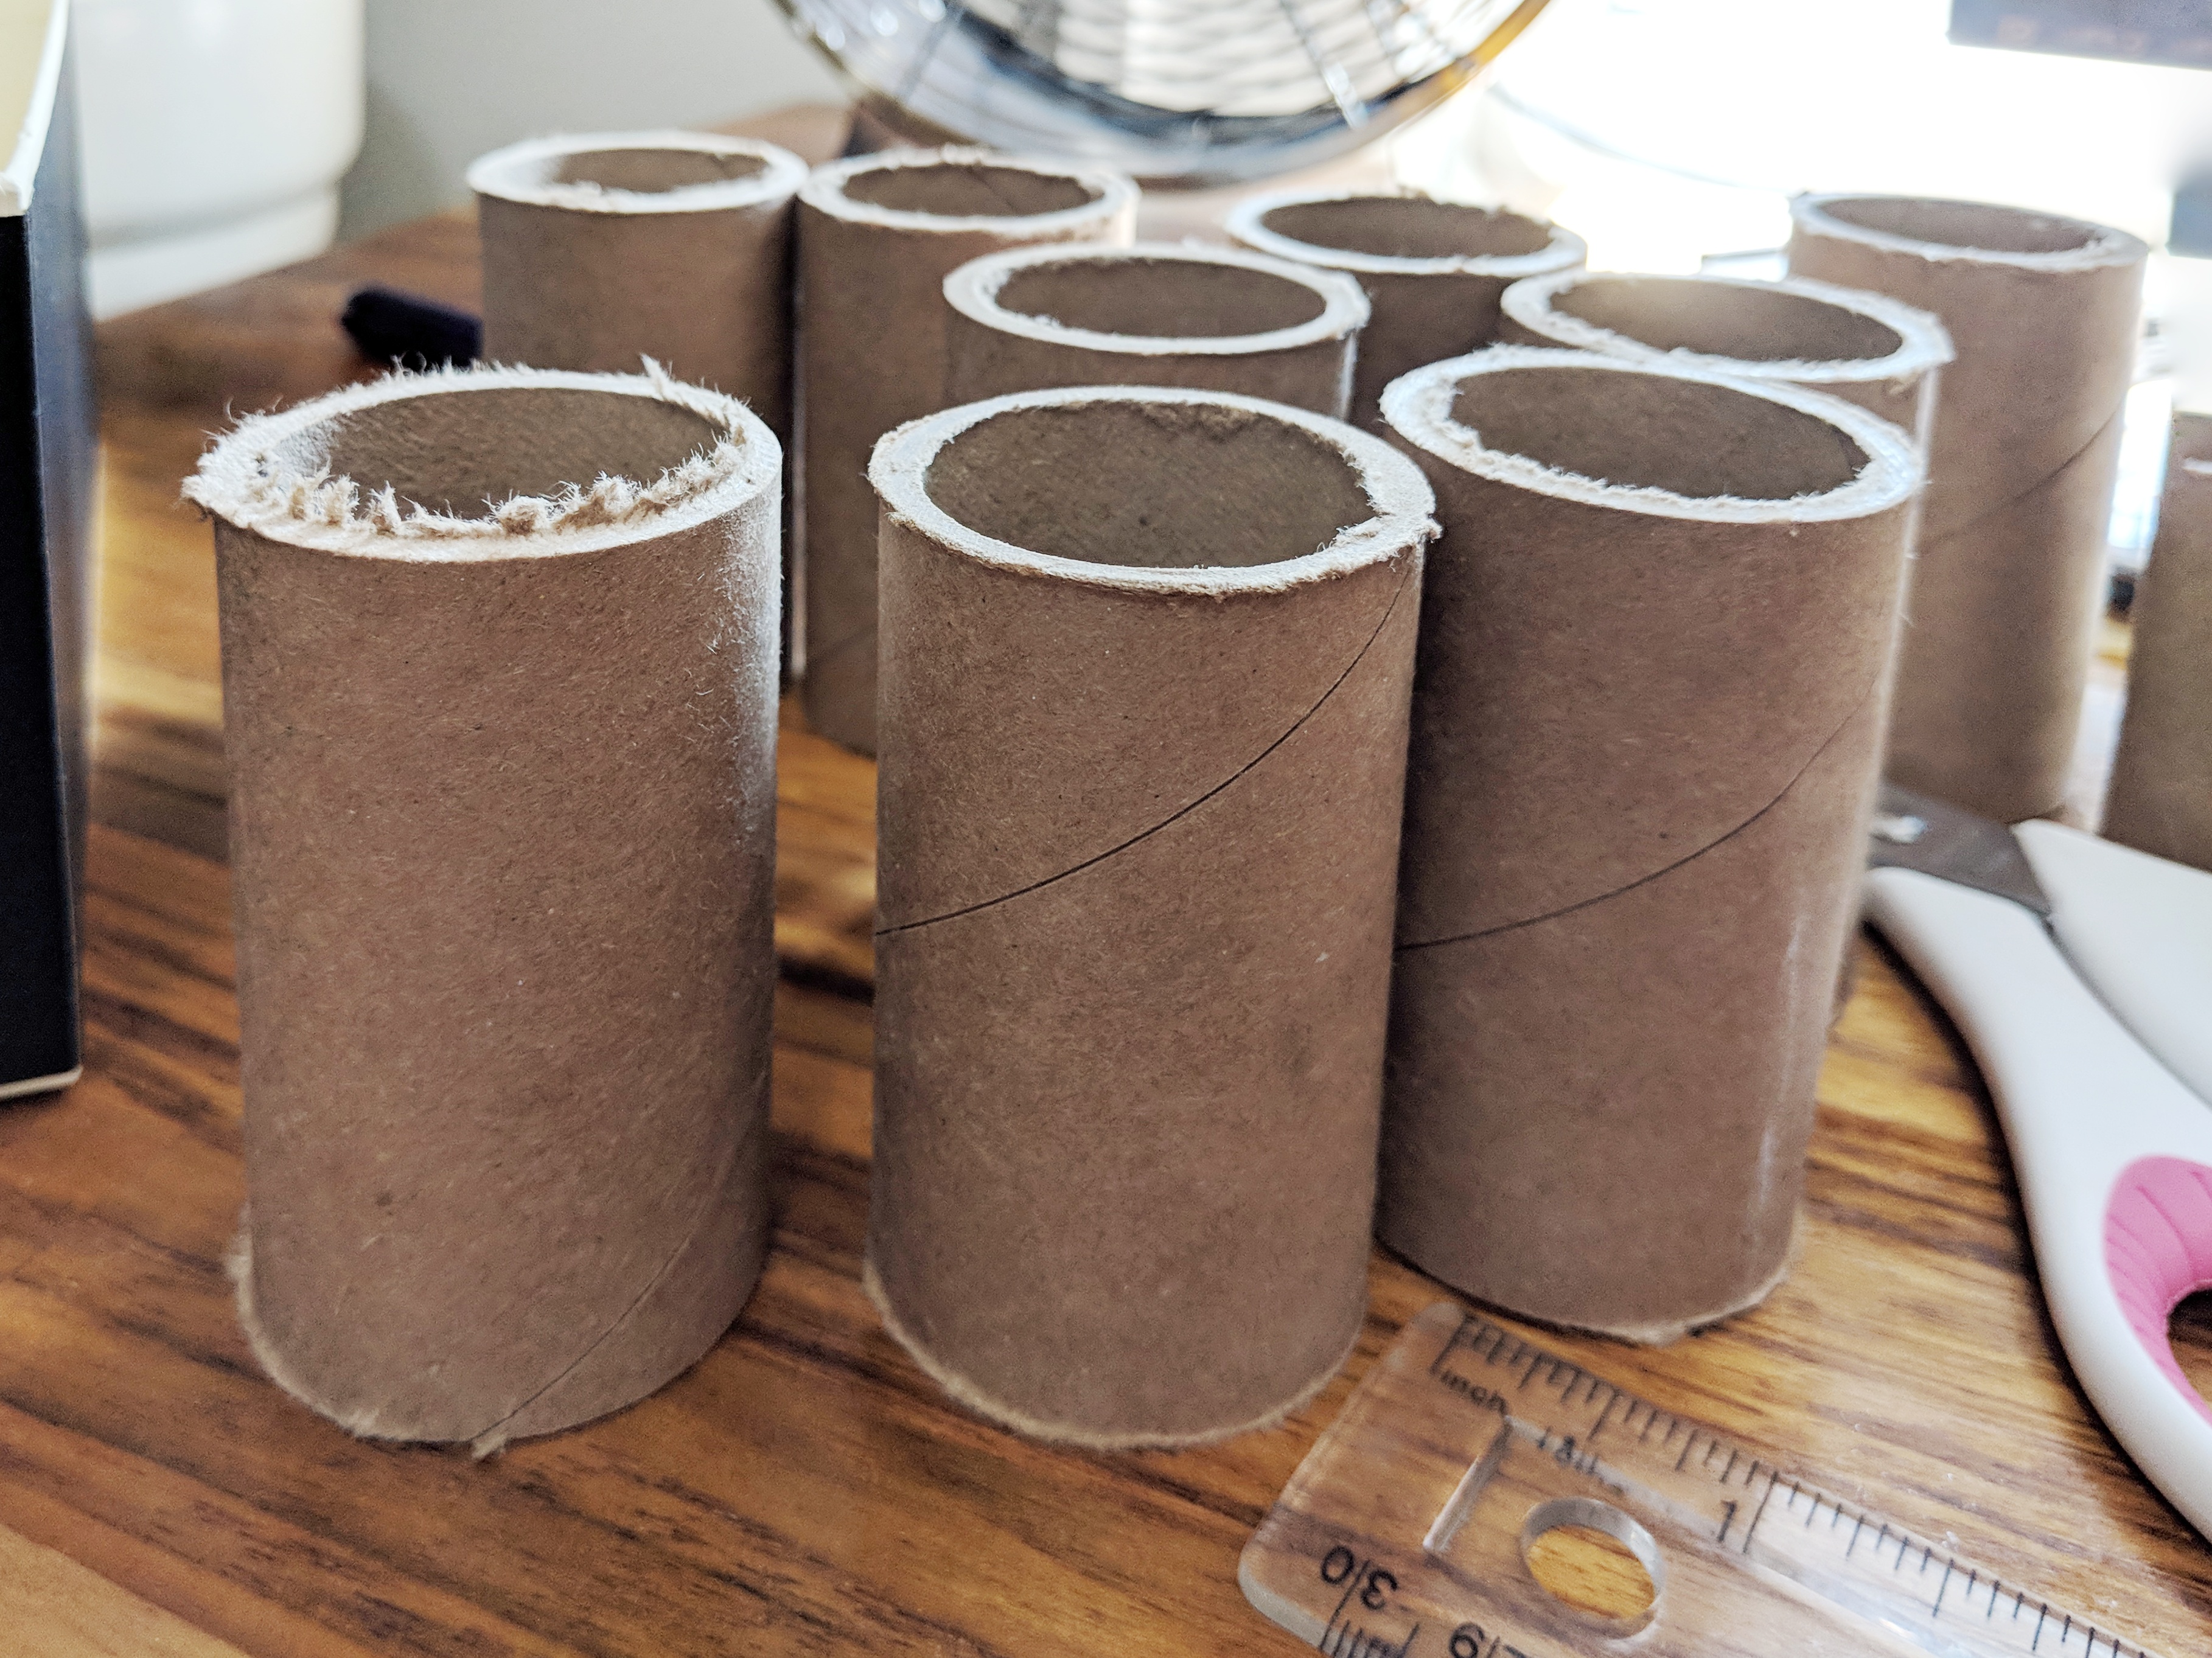
The first step is cutting the cardboard tube to whatever height you want it to be. I settled on 3 inch lengths, since that’s tall enough to hold most tall lipsticks/pencils upright, and is slightly shorter than the box I used.
Depending on how thick the cardboard is, you’ll need a knife or a saw to cut it apart. Use your judgement. I went straight for the miter saw because a) I have one, b) the cardboard I used is pretty thick and c) I’m lazy, and using a hand saw would have been a lot of work.
Note: Be sure to use eye protection because cutting cardboard throws up a TON of dust, and ‘in your eye’ is way down there on the list of places it should be.
You may end up with some rough edges around the edge of your tubes, especially if your blade is super dull like mine. I cleaned these up by trimming them off with scissors.
Step 2: Do a Test Fit
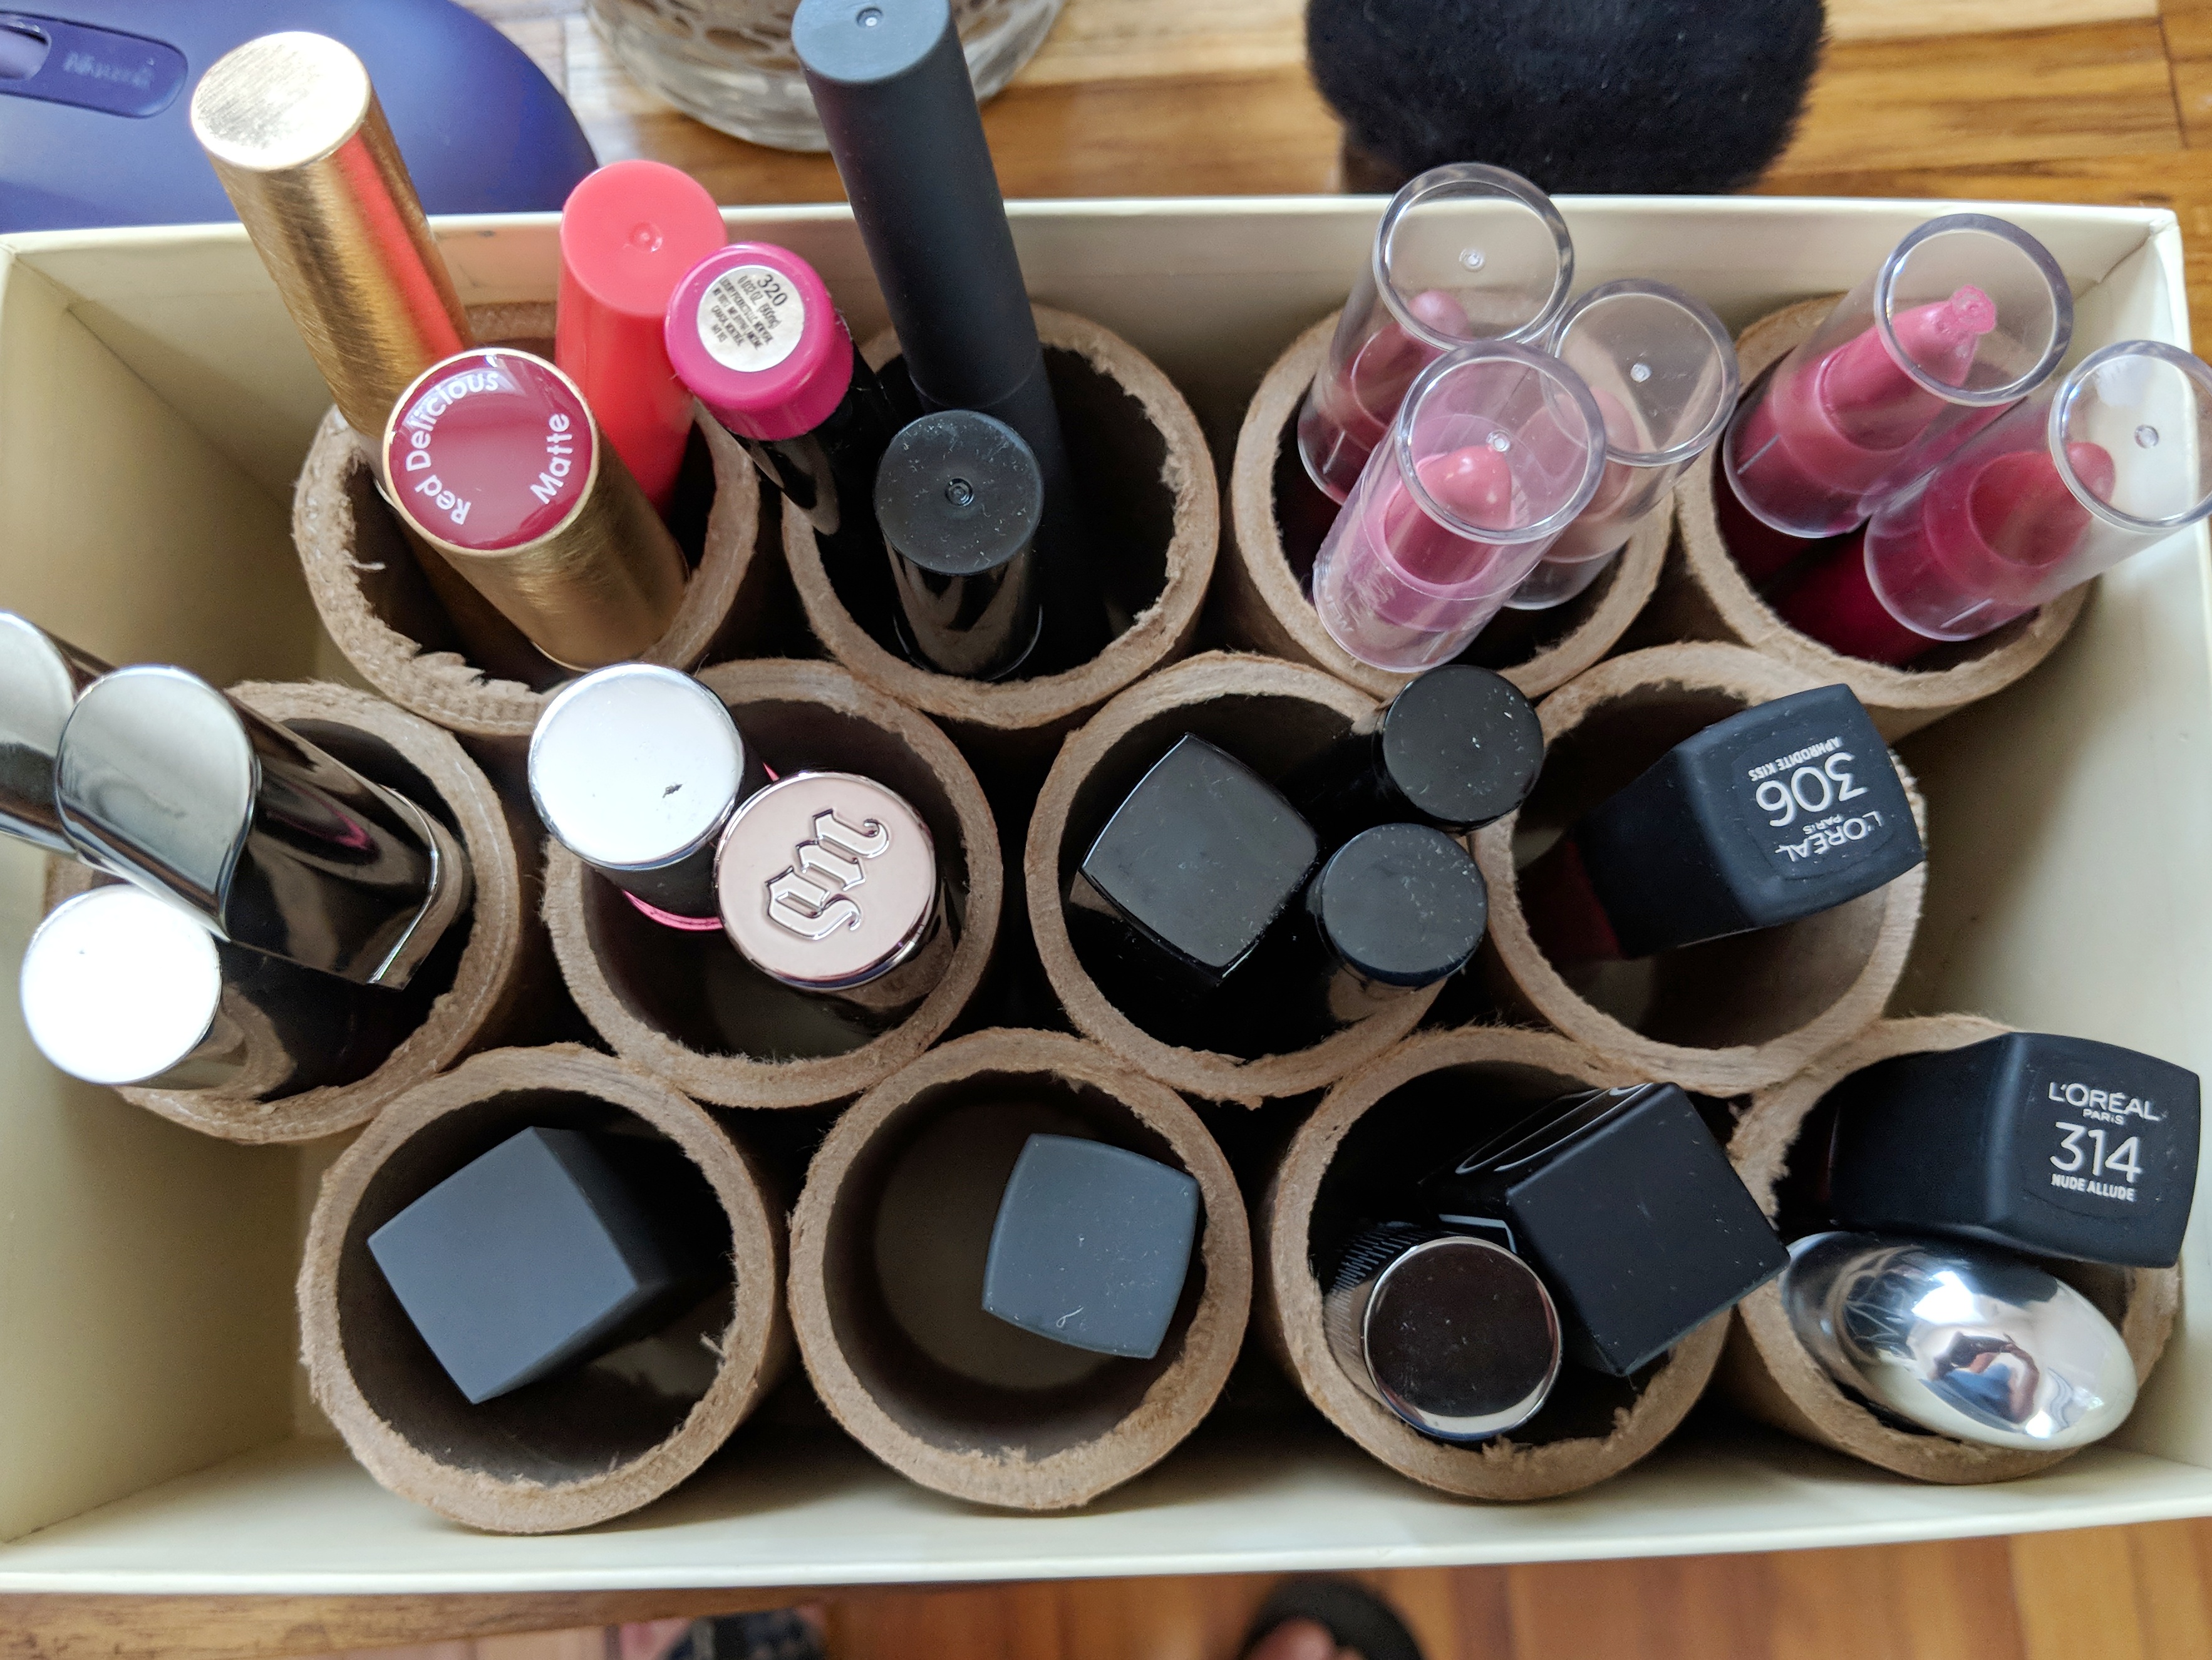
This part is very trial and error. Take your tube pieces and test the arrangement inside the box to see how they fit best, whether you need more, etc. Or maybe you’ll find out a slightly different size box would work better.
At this point, you could just plop the tubes into the box and call it a day. That’s almost what I did, but it wasn’t very cute and kraft cardboard generates a lot of lint/dust, so I wanted to cover them somehow.
Step 3: Cover Your Tubes
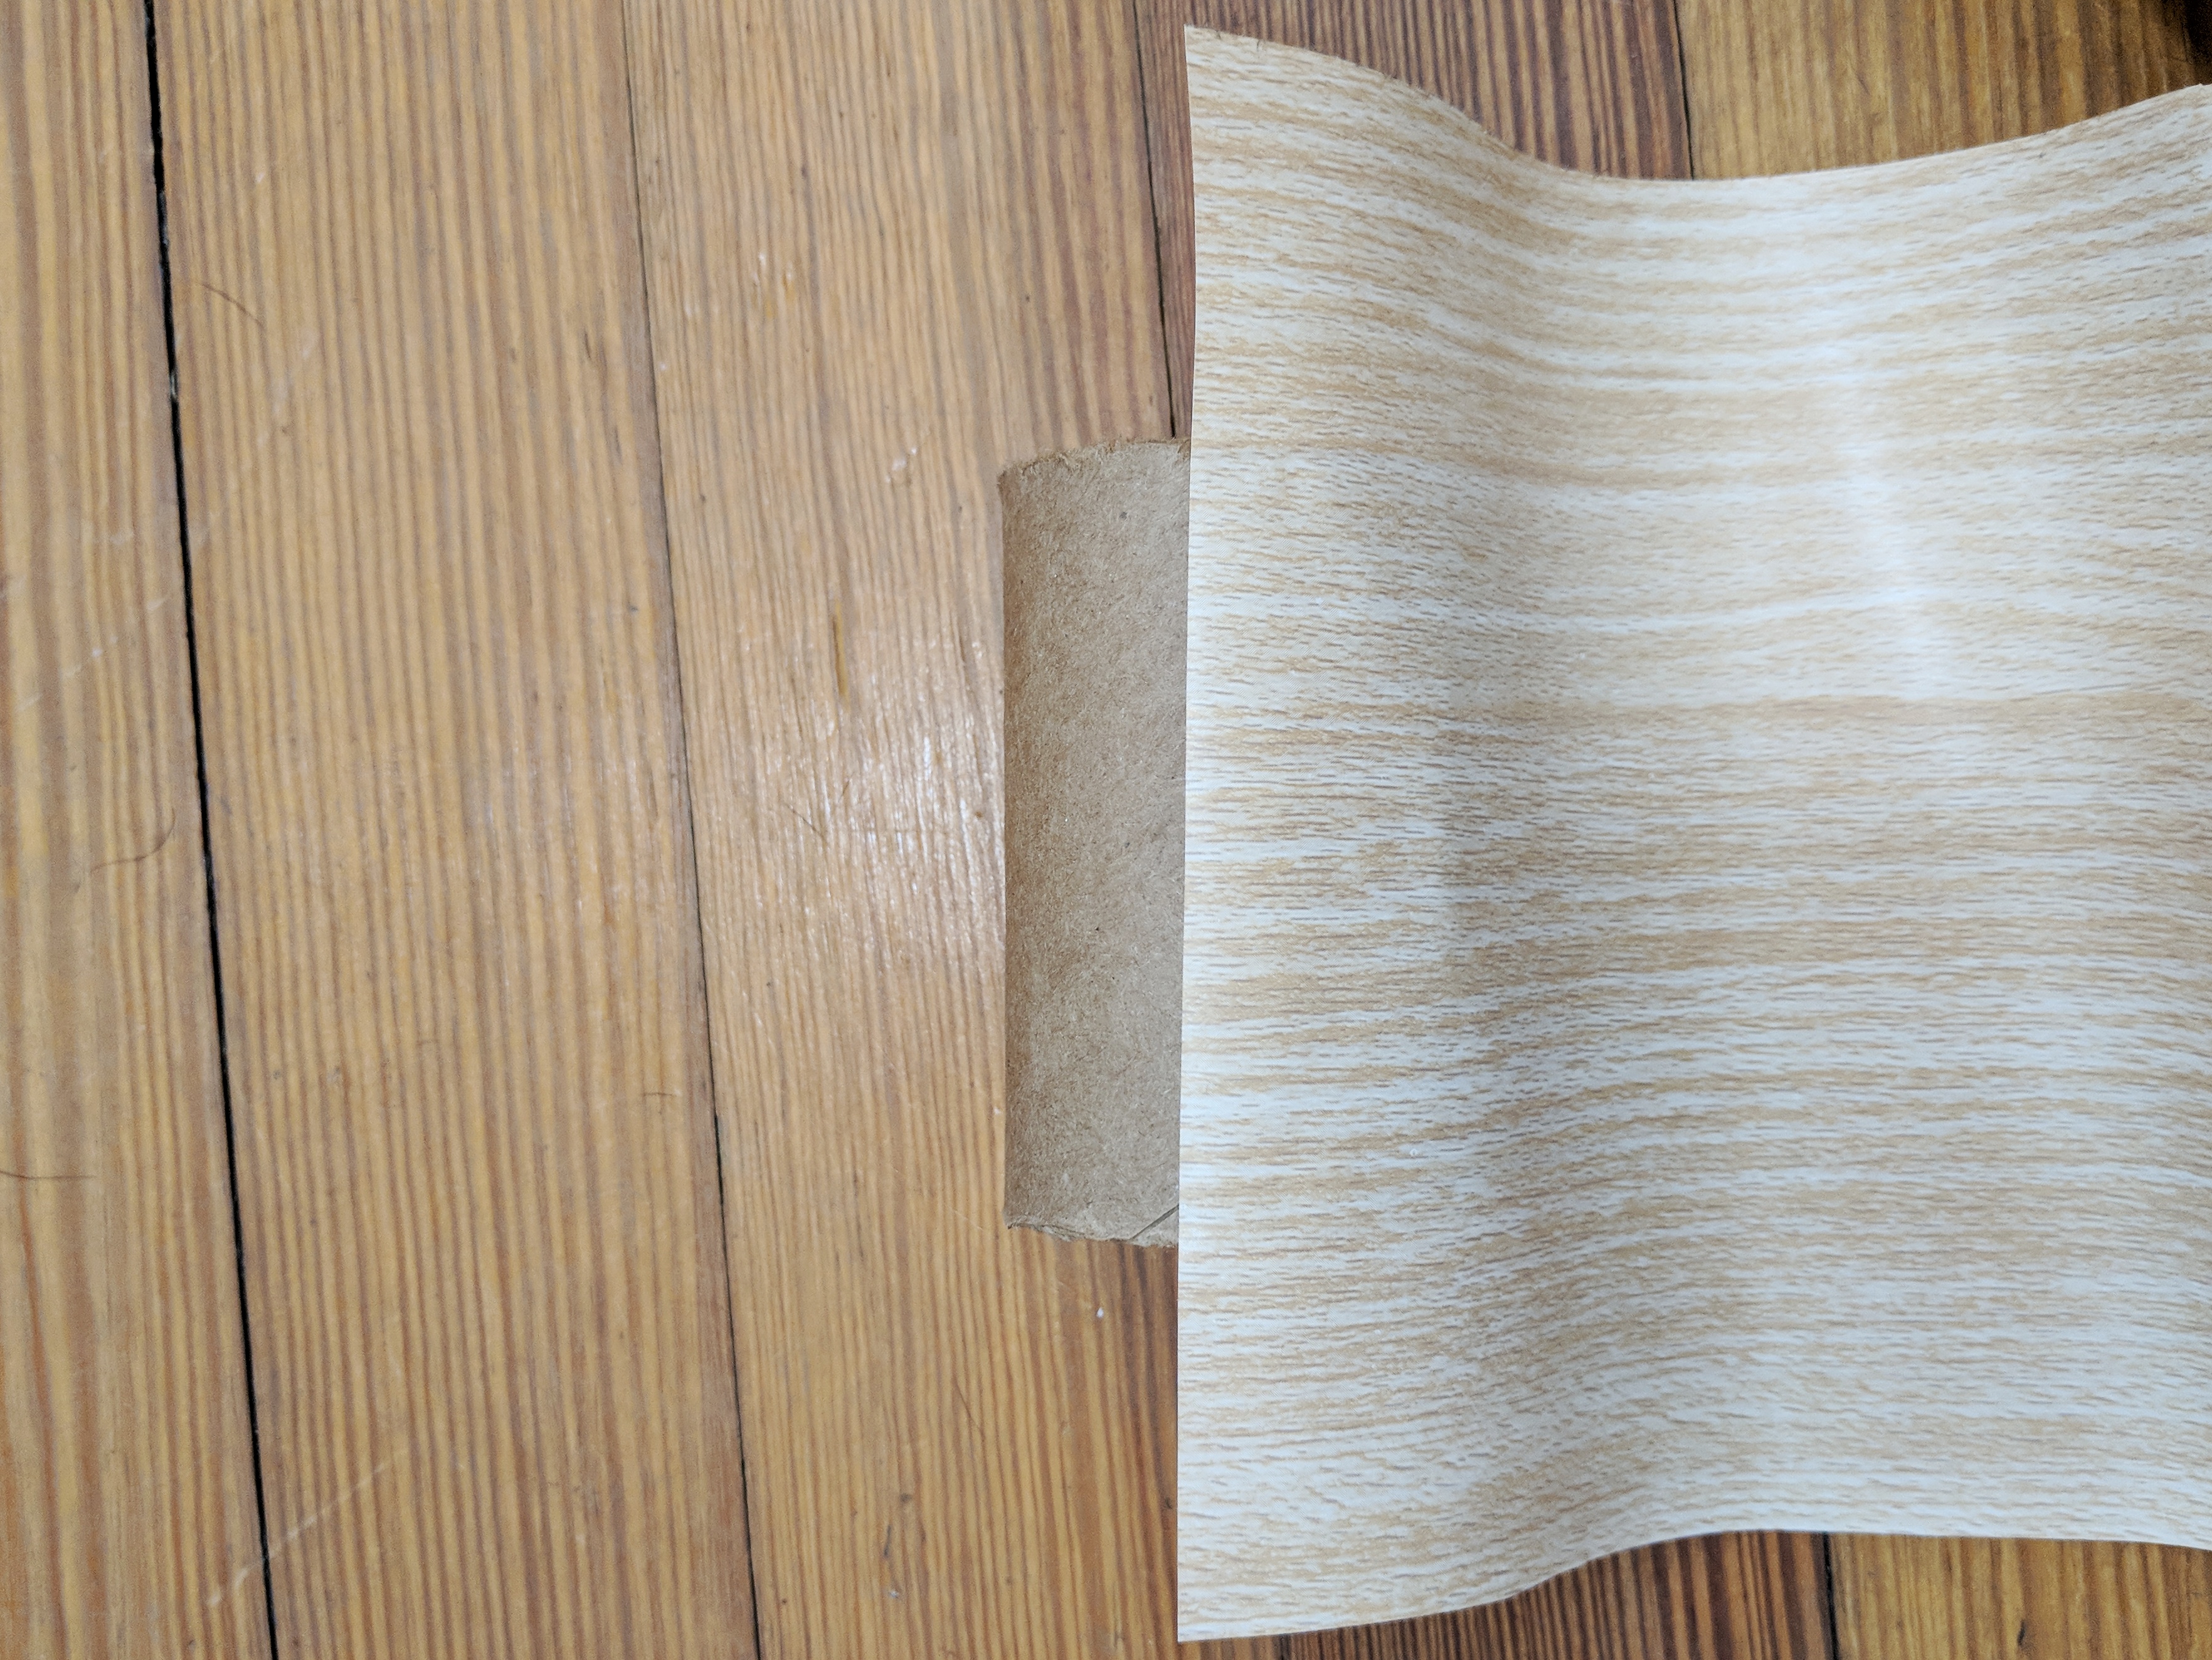
Time to dress things up a little bit! I had some shelf liner left over from the cabinets at my old house so I used that. Normally I would have picked a solid color or at least a cuter pattern than woodgrain, but again, I was trying to use stuff that was likely to get recycled or thrown out.
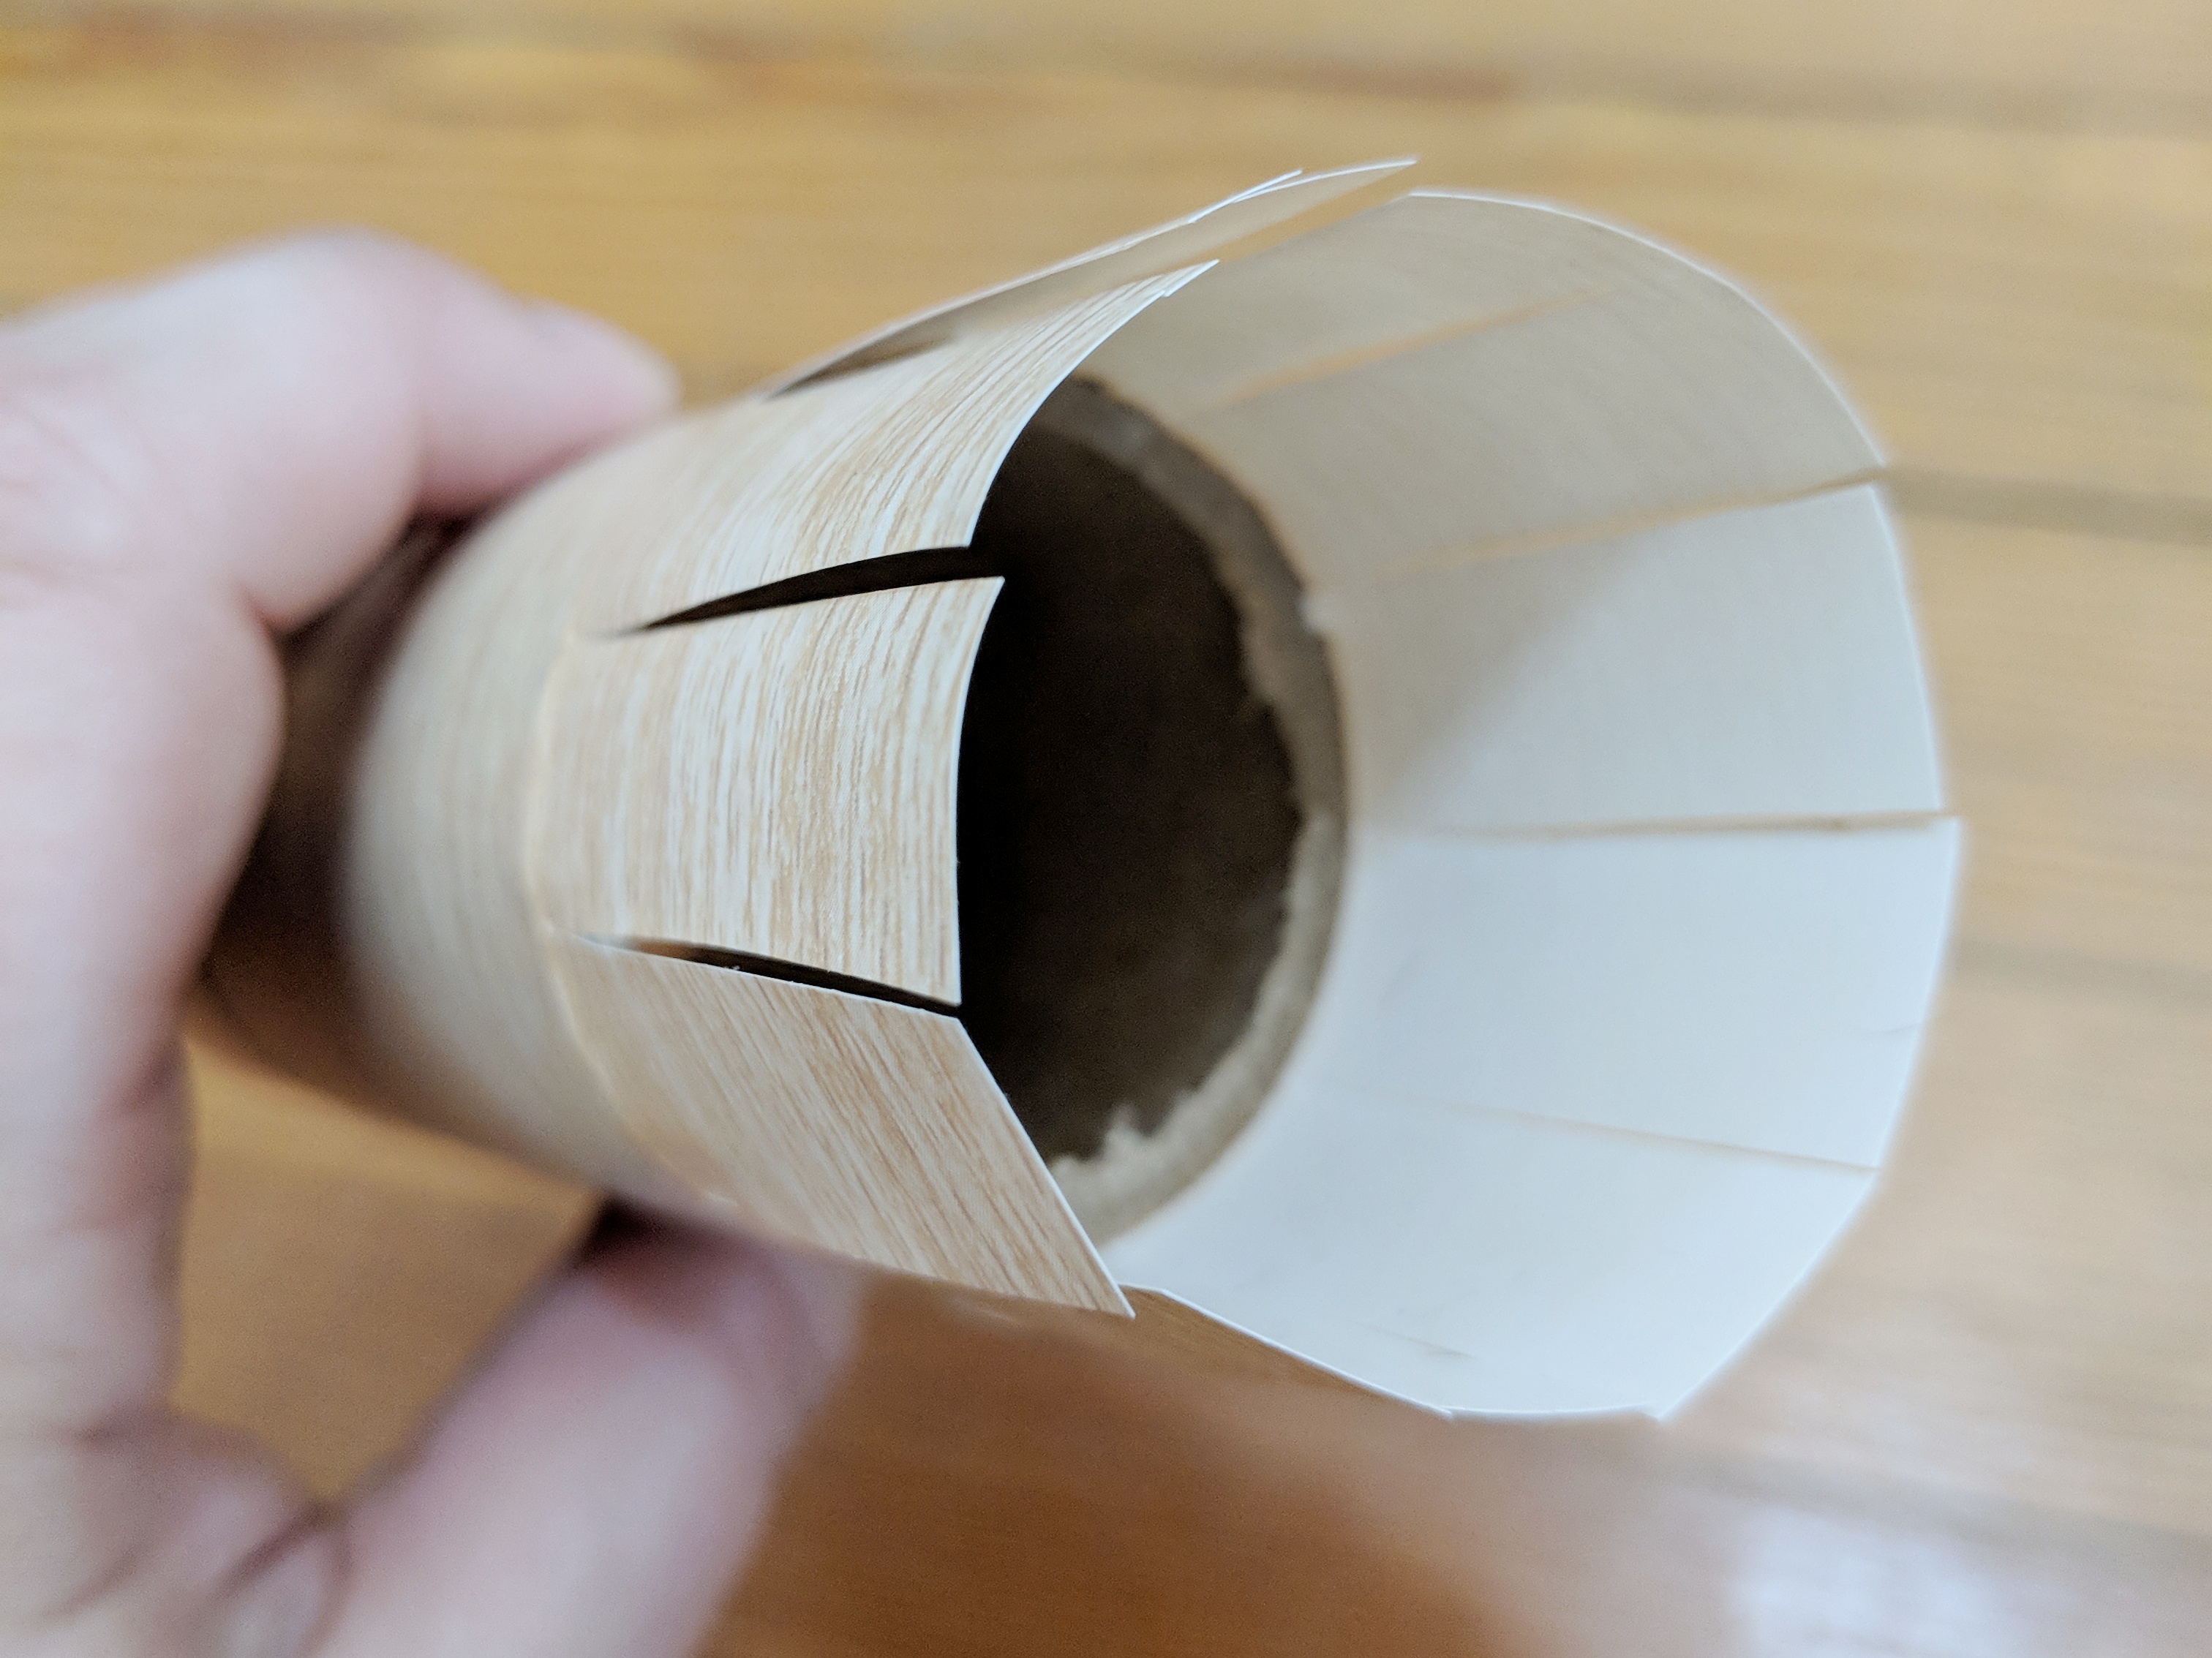
3A – Cut the contact paper a few inches longer than the length of your tube, and wide enough to wrap around it. Making it extend past the ends of your tube helps it stick better to the inside.

3B – Wrap the paper around the tube, smoothing it down as you go. You’ll end up with something that looks like a cylinder of contact paper.
3C – Make vertical cuts all around the excess, down to the edge of the tube. The closer together the cuts are, the smoother the end result will look.
3D – Fold each ‘slice’ of the contact paper over the edge and smooth it down on the inside of the tube.
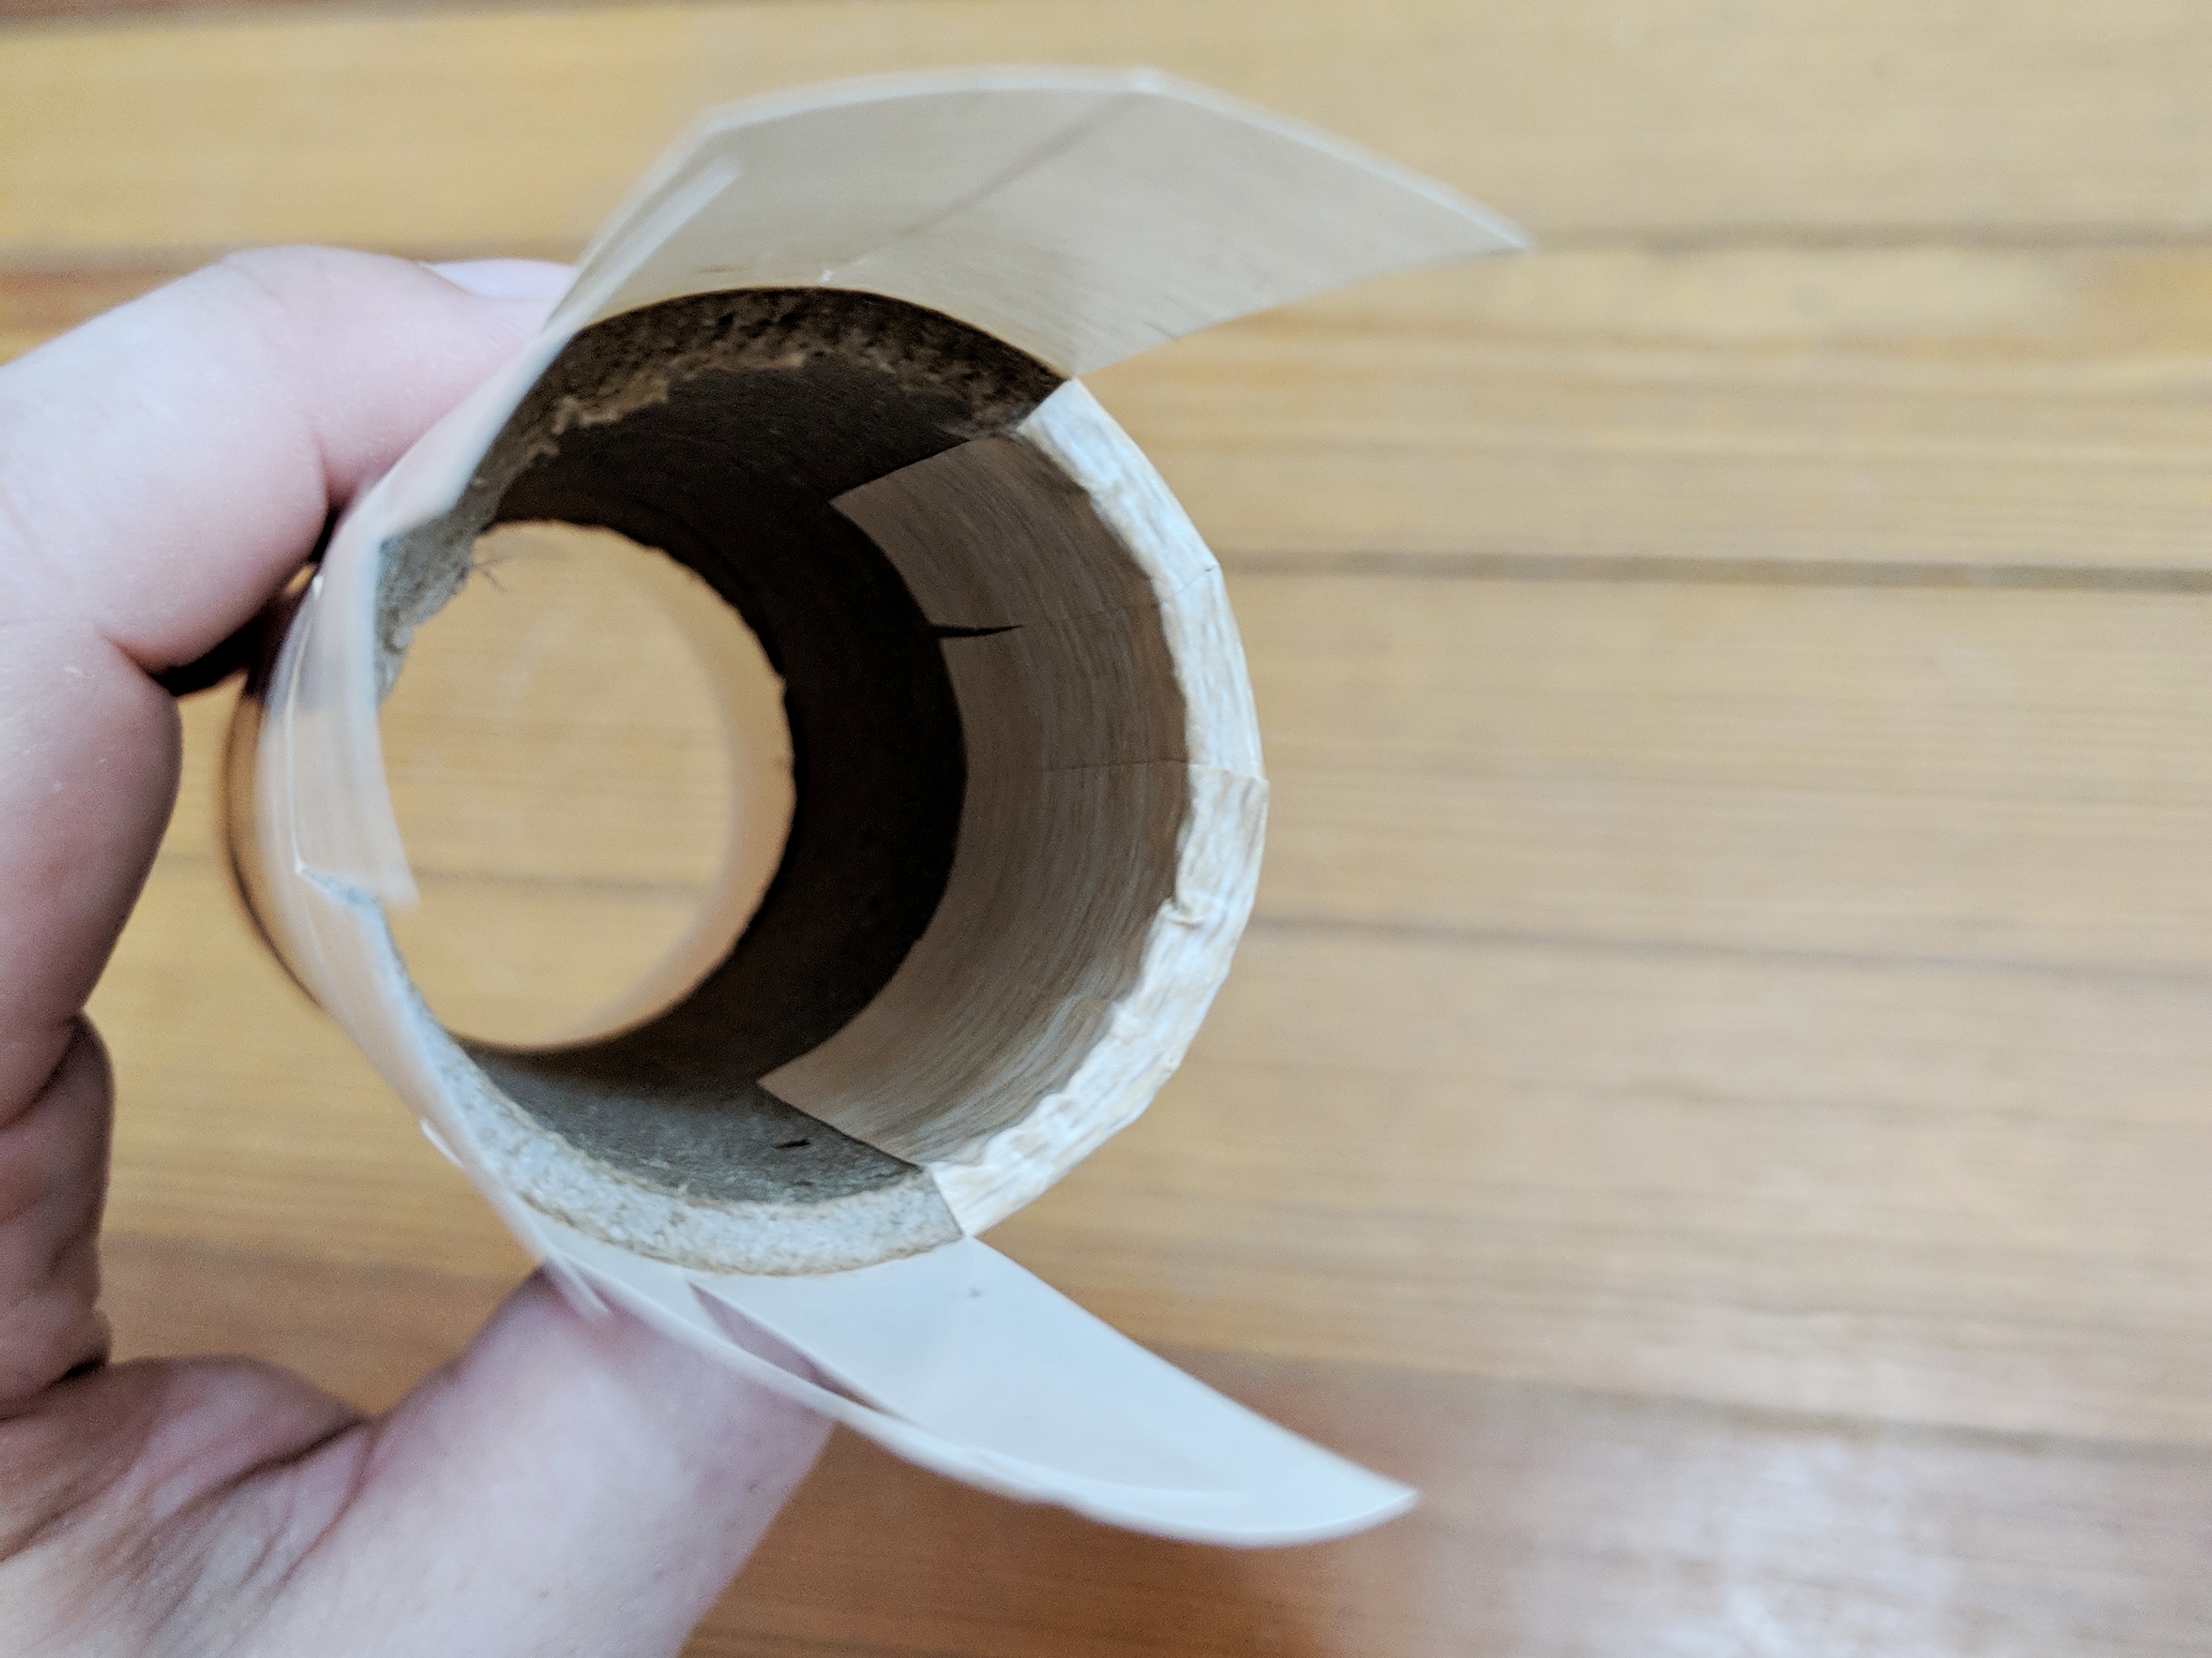
Tip: I found by trial and error that it can be a little easier to cut one or two sections at a time, then fold them down. Sometimes they would stick together if I made all the cuts at once.
3E – Repeat 3A-3D for the other end.
Step 3: Glue tubes together (optional)
After you’ve covered the tubes & done a test fit, you may want to glue them together, especially if they aren’t a snug fit in your container. Just run a line of hot glue down the side of the tube where it makes contact with the piece next to it.
I did not do this.
Step 4: Fill with makeup

This particular organizer is good for anything tall and thin. Lip pencils, eyeliners, eyeshadow sticks… you get the idea.
Bonus Tip
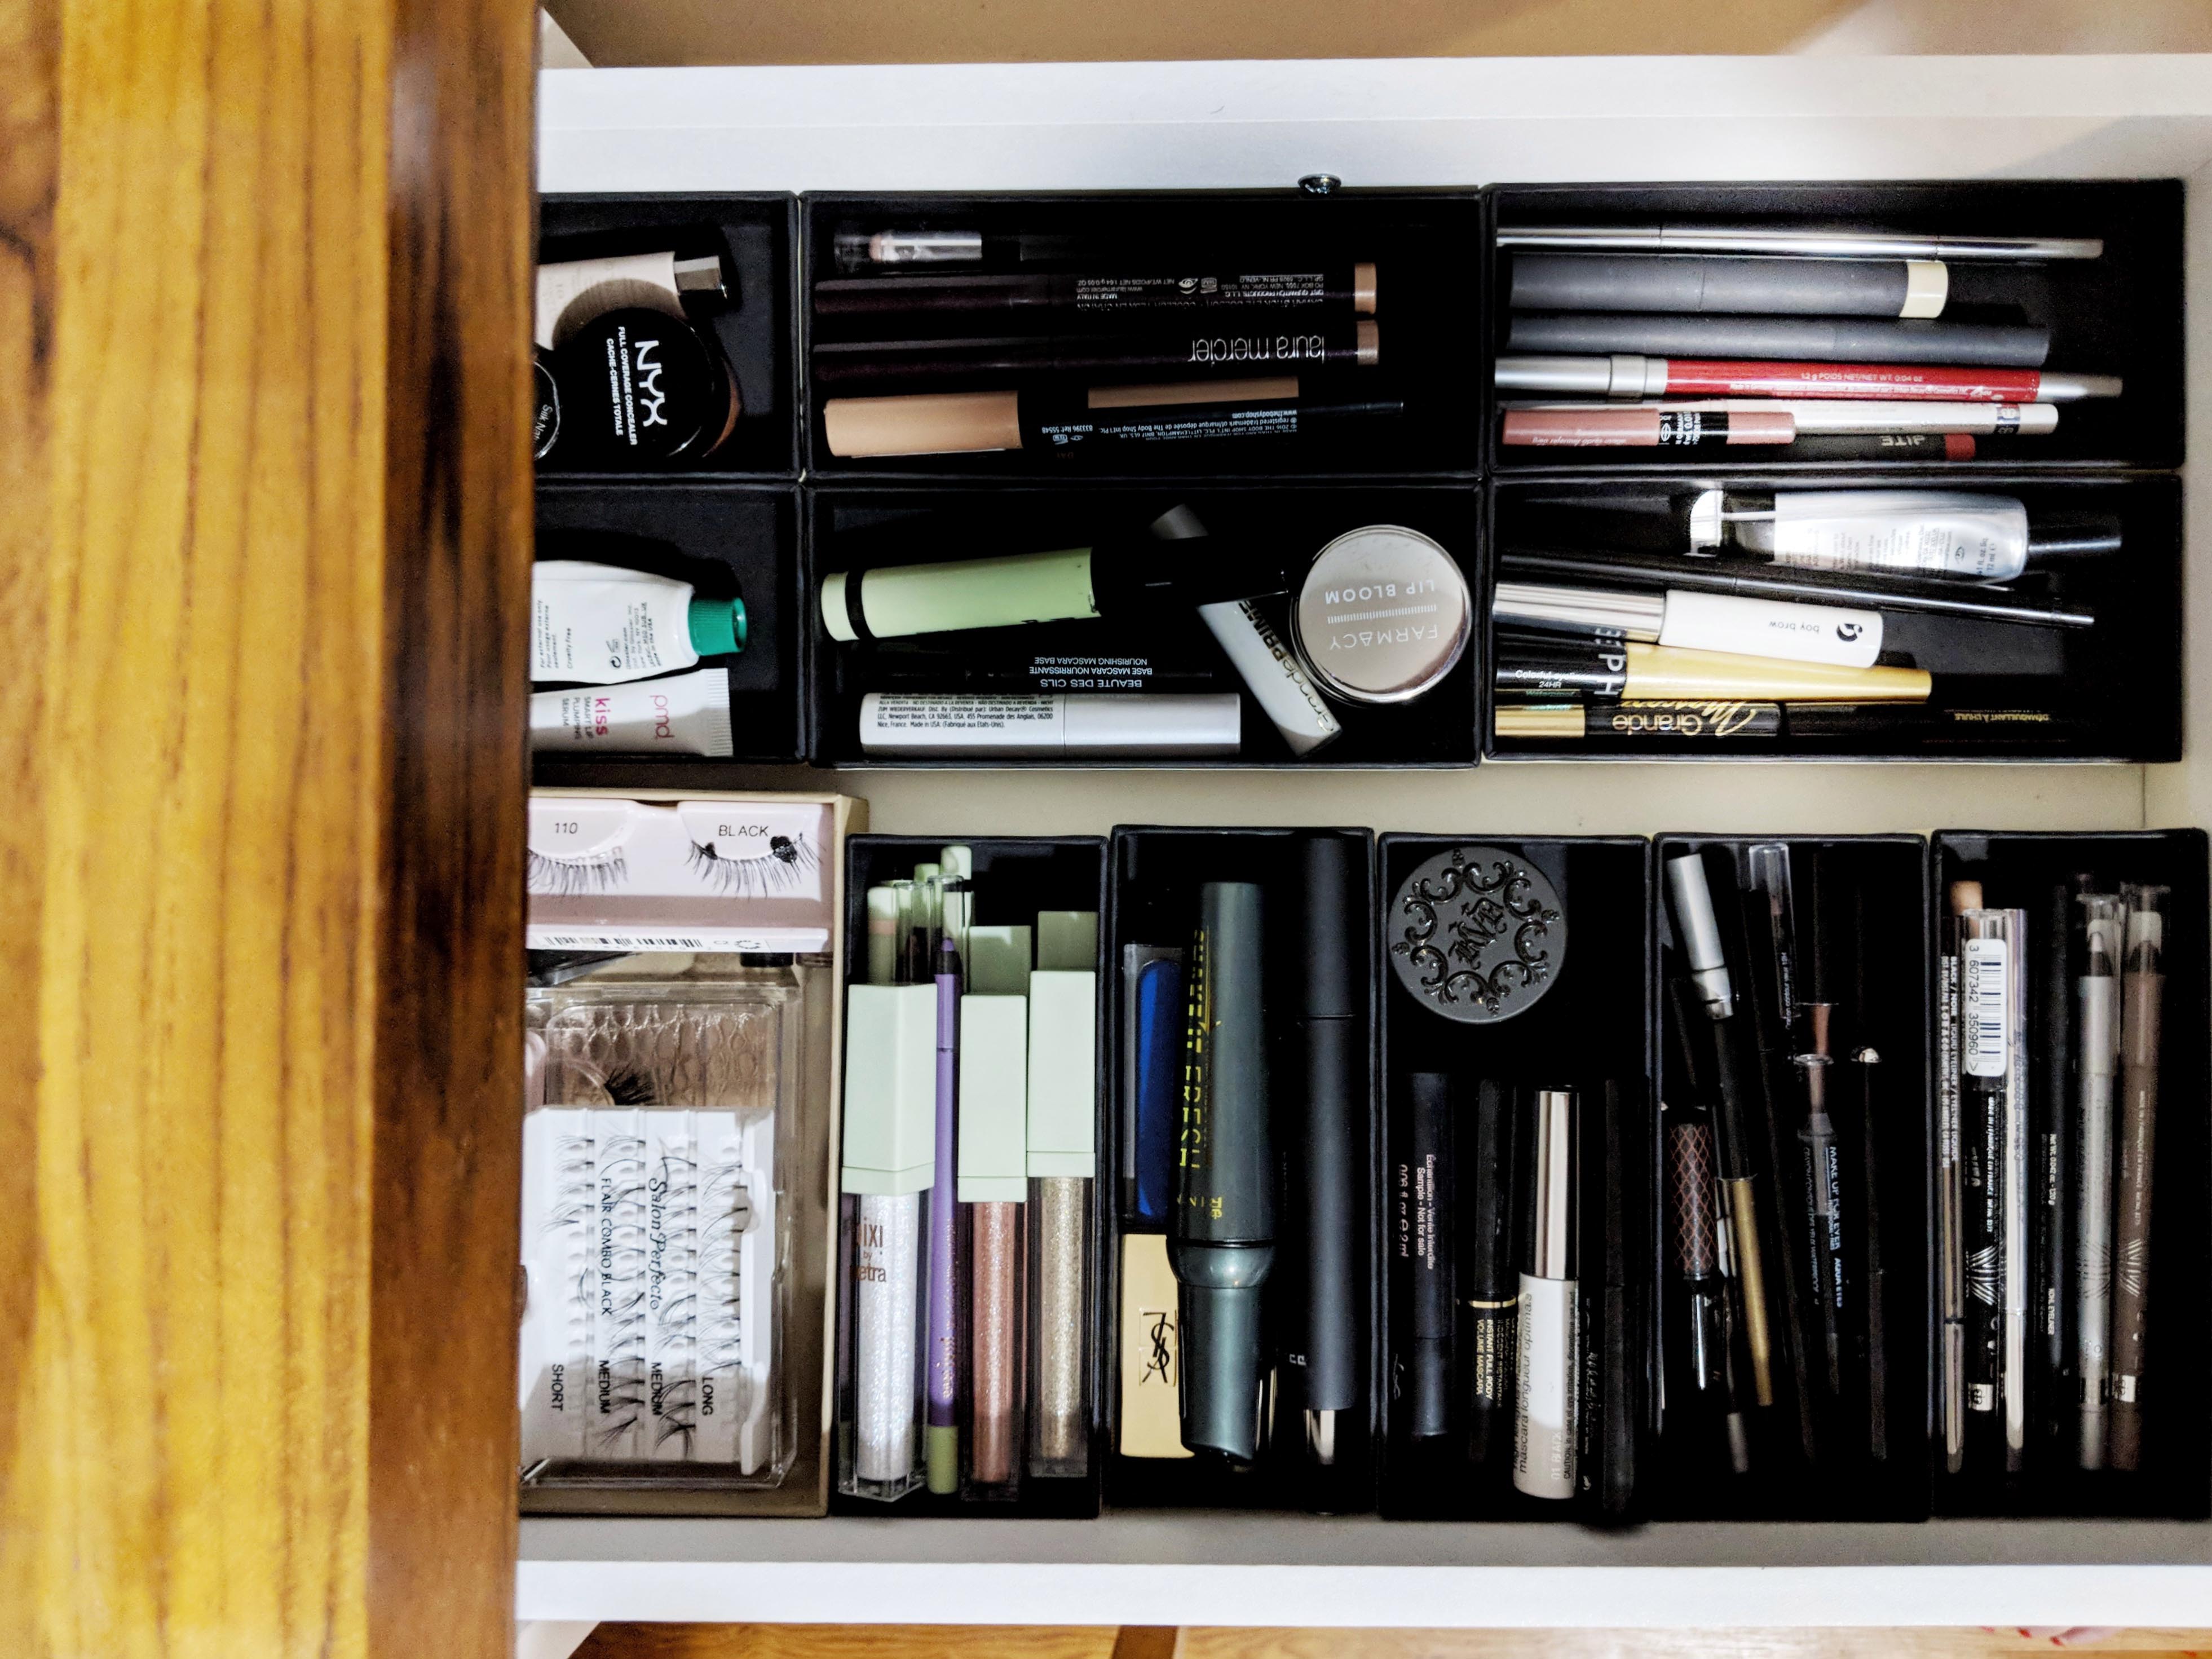
Looking for smaller non-plastic drawer organizers to go in the shallow Alex drawers? The small Jo Malone gift boxes (the ones the 1oz colognes come in) are a really nice fit! Side note: you can read more about my Jo Malone addiction here.
I’d love to see your favorite upcycling project, or the end product if you try this one! Share a photo on instagram with the hashtag #lipsticklatitudeDIY so we can all check it out!
Leave a Reply